Studio Usage
Tinymovr Studio is a cross-platform GUI application, CLI application, and Python library that offers easy access to all of Tinymovr’s functionality.
This documentation page includes examples both for the GUI as well as the CLI apps.
Launching Studio
GUI
tinymovr
CLI
tinymovr_cli
Alternative Adapters/Firmwares
By default Tinymovr Studio searches for either slcan-compatible CAN bus adapters or adapters using the CANine firmware [1]. To specify an alternative device, use the –bus command line argument.
For instance, to work with SocketCAN-compatible adapters in linux, launch Tinymovr Studio as follows:
GUI
tinymovr --bus=socketcan
CLI
tinymovr_cli --bus=socketcan
Compatibility
Tinymovr Studio includes by default a checksum comparison to determine protocol compatibility between firmware and studio version. This is performed each time a node is discovered, and prior to initializing the tinymovr object. If you see a compatibility-related message, please upgrade to the latest studio and firmware versions.
Custom Device Specs
You can specify a custom device spec (YAML file) as a command line argument:
GUI
tinymovr --spec=/path/to/myspec.yaml
CLI
tinymovr_cli --spec=/path/to/myspec.yaml
This is useful, for instance, if you have altered the default Tinymovr spec files. Using this parameter with a project developed using Avlos, you can even use Tinymovr Studio to control your own custom devices!
Issuing Commands in CLI
CLI
You can read/write variables and issue commands using the respective Tinymovr handle, e.g.:
tm1.encoder
or
tm1.controller.pos_setpoint = 10000
Replace “tm1” with the correct device ID if necessary. Full tab completion is available.
Multiple Instances
In order for multiple Tinymovr instances to coexist in the same CAN network, they need to have unique IDs. The default ID is 1. To assign different IDs to each board, follow the method below:
Connect a single Tinymovr to the bus and launch Studio. The board will be assigned the default ID, 1, and will be accessible as tm1.
GUI Change the ID

The board will be discovered with the new ID. Studio GUI will rescan, discover the new node, and remove the old instance.
CLI Change the ID
tm1.comms.can.id = x
where x is the desired ID. You can assign IDs in the range 1-1024.
The board will be discovered with the new ID. Relaunch Studio CLI to remove the old board instance.
GUI Save configuration.

CLI Save configuration.
tm1.save_config()
Power down or reset the board. Tinymovr is now ready to use with the new ID.
Command-line options
Tinymovr Studio supports the following command line options.
--bus=<bus>
The –bus option specifies a CAN bus type to use.
Example:
GUI
tinymovr --bus=canine
CLI
tinymovr_cli --bus=canine
All interfaces offered by python-can are supported.
--chan=<chan>
The –chan options specifies a channel to use, optionally together with the –bus option.
Example:
GUI
tinymovr --bus=socketcan --chan=CAN0
CLI
tinymovr_cli --bus=socketcan --chan=CAN0
By default, Tinymovr Studio will use slcan as the interface, and will search for CANAble/CANtact-type devices with slcan firmware. Such is the CANine adapter supplied with Tinymovr Servo Kits.
--bitrate=<chan>
Specifies a bitrate in baud.
Example:
GUI
tinymovr --bus=socketcan --bitrate=1000000
CLI
tinymovr_cli --bus=socketcan --bitrate=1000000
By default, Tinymovr Studio will use 1000000 as bitrate. We tested with 1000000, 500000 and 250000 baud.
Units
Tinymovr Studio introduced physical units and quantities since v0.3.0. Units are introduced through the Pint package. Using units you will see all values that you query associated with a unit, which forms a physical quantity.
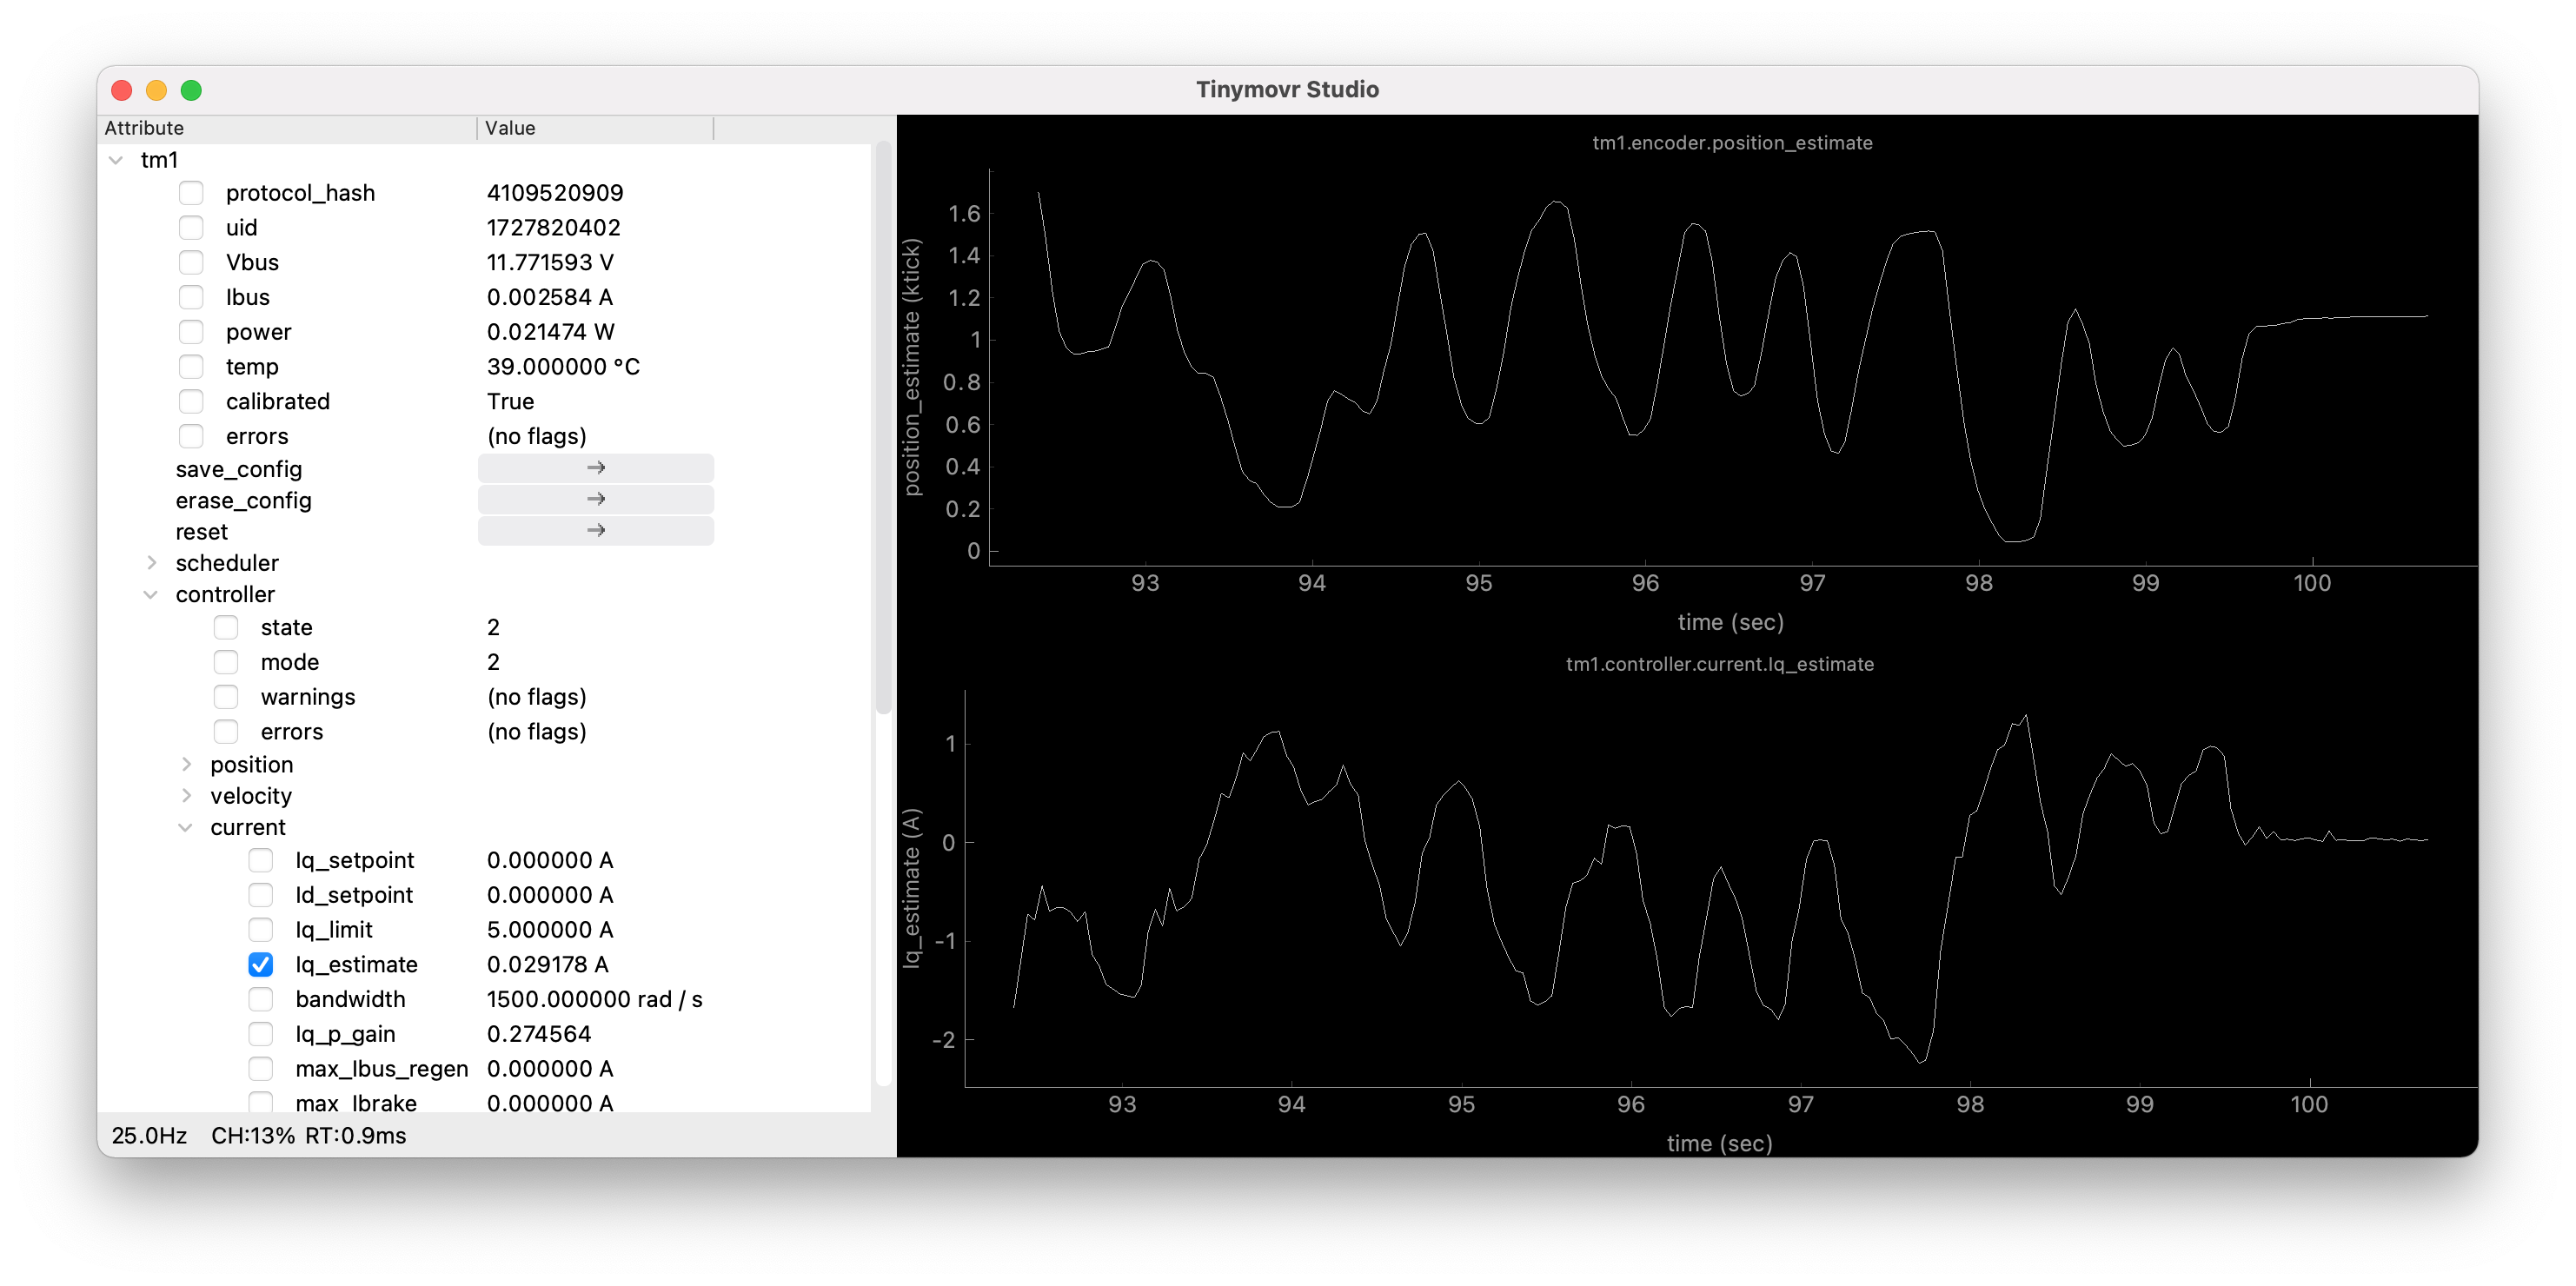
GUI
In the GUI, units are displayed by default in any quantity that supports them. For instance:
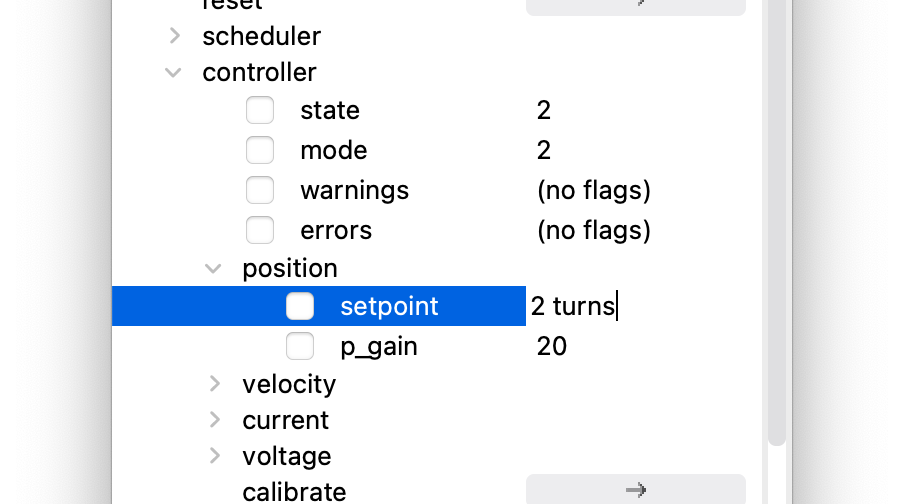
You can set any quantity supporting units by specifying the desired compatible unit next to the quantity you want to set. For instance, to set the position setpoint:
CLI
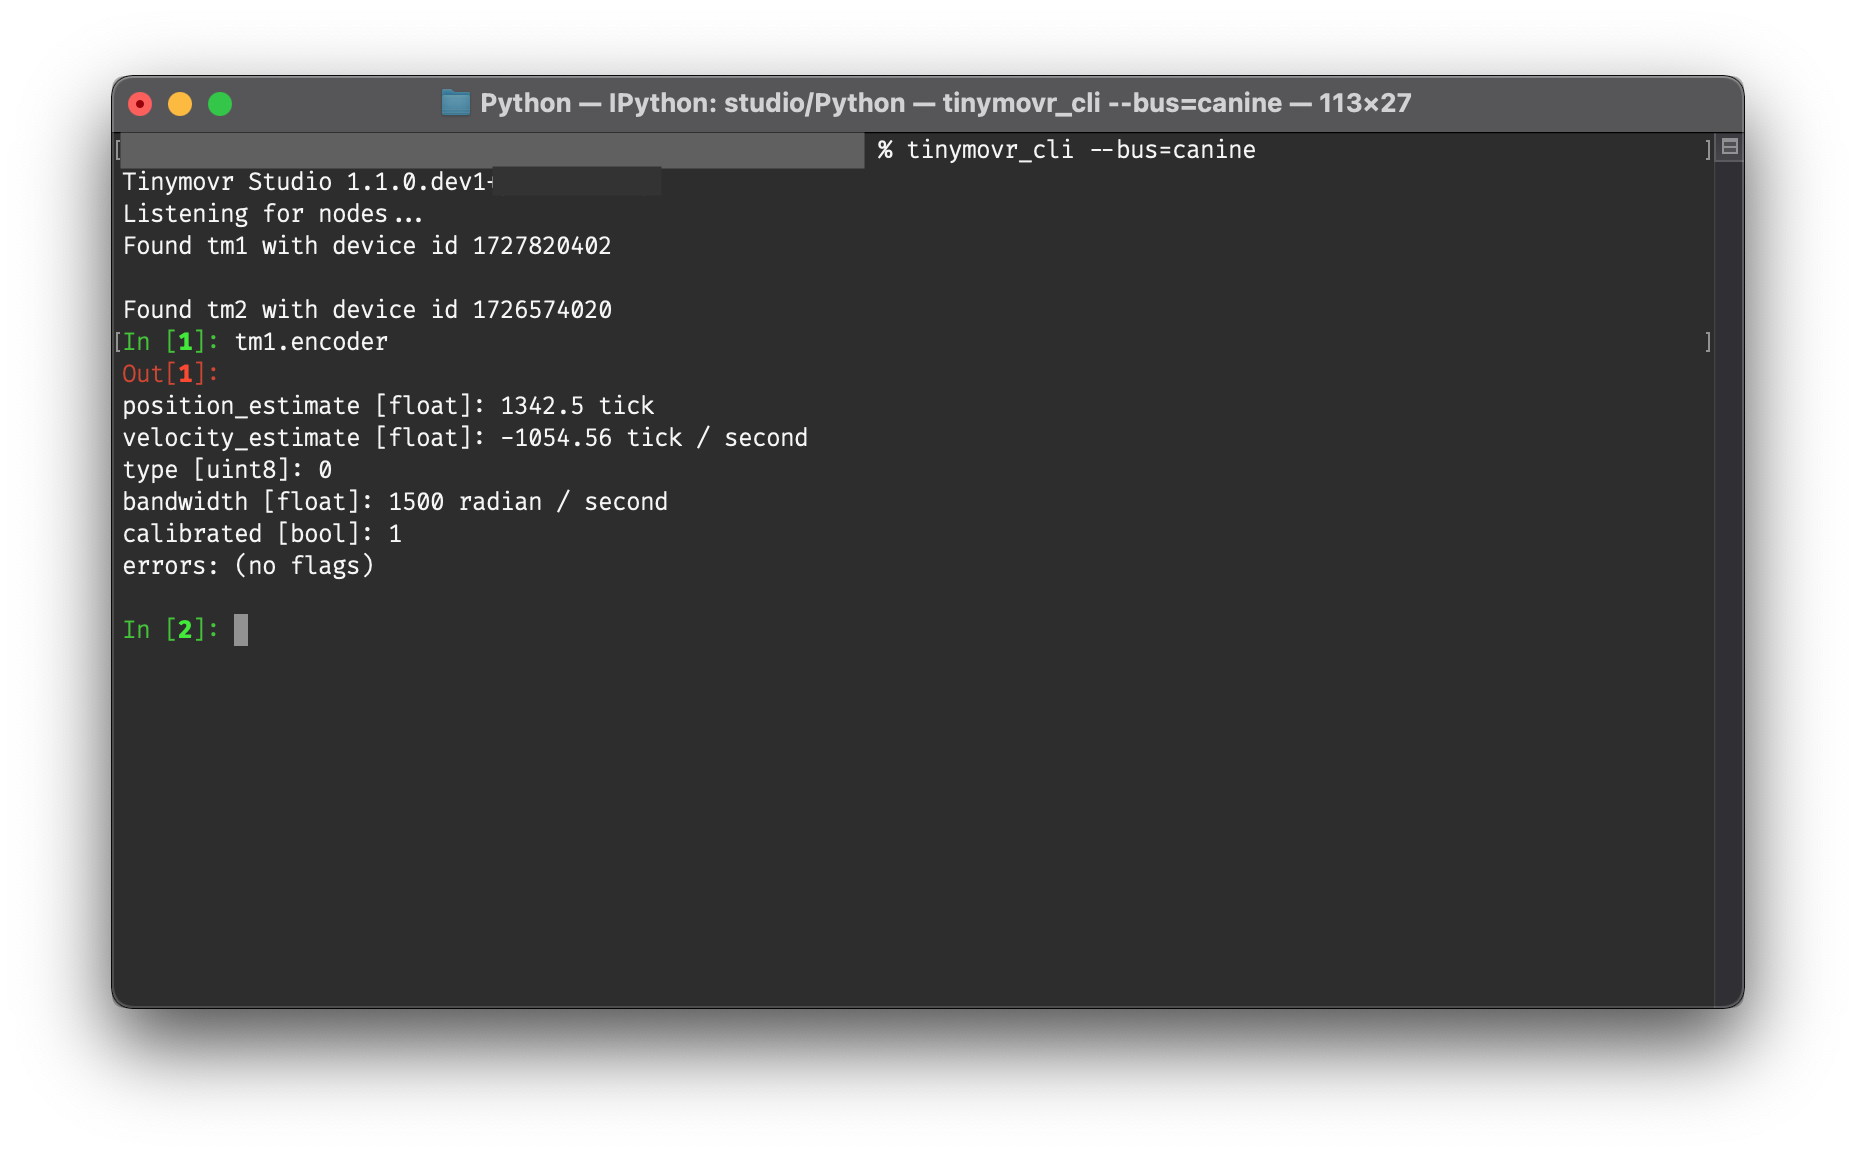
In the CLI, units are displayed whenever a quantity that supports them is printed:
In [1]: tm1.encoder.pos_estimate
Out[1]: 0.0 <Unit('tick')>
You can also set quantities in any (defined) unit you wish. For instance:
In [1]: tm1.controller.pos_setpoint = 2.0 * rad
The above will set the rotor position to 2 radians from the initial position. Similarly for velocity:
In [1]: tm1.controller.vel_setpoint = 3.0 * rad / second
Will set velocity to 3 radians/second. If not unit is used in setting a value, the default units will be assumed, in the above cases ticks and ticks/second.
The ureg object is the unit registry, and it is that which holds all unit definitions. You can use it to do all sorts of cool stuff such as doing conversions, defining your own shortcuts or even new units.
For instance, to define a few frequently used shortcuts in a program:
from avlos import get_registry
ureg = get_registry()
mA = ureg.milliampere
rad = ureg.radian
s = ureg.second
Then you can use the defined shortcuts to intuitively set values, such as a position setpoint with velocity and current feed-forwards:
tm1.controller.pos_setpoint = 2*PI * rad
tm1.controller.vel_setpoint = PI * rad/second
tm1.controller.cur_setpoint = 1.5 * ampere
Take a look at the API REFERENCE for default units used in each command.
For more information on units and their usage, take a look at Pint’s documentation
Socketcan & Linux
You can use a socketcan-enabled CAN adapter with Tinymovr Studio. The CANine adapter supplied with Tinymovr Servo Kits supports Socketcan natively with the alternative Candlelight Firmware. To connect to a Socketcan device, run Studio as follows:
GUI
tinymovr --bus=socketcan --chan=CAN0
CLI
tinymovr_cli --bus=socketcan --chan=CAN0